Newsletter subscriptions with Formspree + Airtable + Vero Newsletters
-
TutorialsUpdatedPosted:

On this page
Vero Newsletters is unique because it’s designed to connect to data sources that already hold your customer data rather than to capture and store your data one more time. Vero is kind of like a “Lego” block: you can easily snap it onto the data stores in your stack and build the right solution for your business. In this post we show you how to build and manage a newsletter subscriber list in Airtable and send newsletters to those subscribers with Vero.
Vero connects with lots of data stores. For product-related use cases you can connect directly to a SQL database or data warehouse and query your user data there. For eCommerce companies can use data you’ve queried directly in products like Shopify.
…but what about a simple newsletter or blog subscription use case? How do you setup a subscription form and where do you store the subscribers if Vero doesn’t store them for you? There are lots of ways! In this tutorial we’ll show you how to solve for this use case with Formspree, Airtable and Vero Newsletters.
Overview
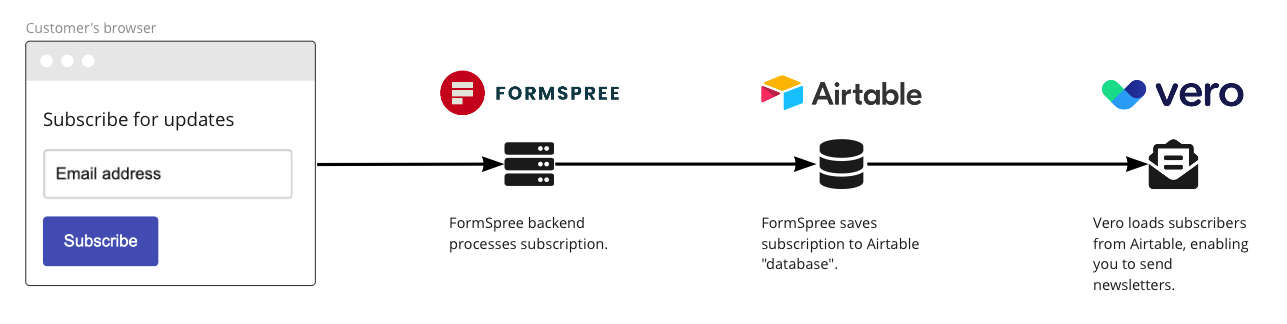
Here’s a visual diagram of the setup we’ll achieve in this tutorial:
Learn how to:
- Use Formspree to generate HTML forms for your website.
- Use Formspree as as a “form backend” to capture form submissions and save those submissions to Airtable.
- Use Airtable as a database to store and maintain a subscriber list.
- Connect to Airtable and use Vero Newsletters to send a newsletter to your subscribers.
1. Use Formspree to create a HTML form
Formspree makes it extremely easy to generate HTML forms — that’s what it’s built for! Simply sign up and select “New Form”. Give your form a name (e.g. “Newsletter subscription”) and away you go.
Once you’ve created a new form Formspree will provide you with a
“form endpoint” and some example HTML. You can add any HTML
input fields to your form and Formspree will
elegantly handle them when the form is submitted. For this
tutorial ensure your HTML includes an
email input and a submit button.
Here’s a very simple example you can place on your website (but
make sure you replace the
unique_form_id with your
form endpoint):
<form
  action="https://formspree.io/f/unique_form_id"
  method="POST"
>
  <input type="email" name="email">
  <button type="submit">Subscribe</button>
</form>
2. Use Formspree to process form submissions and save them to Airtable
Any time your form is submitted Formspree will store a record of the submission. You can also configure Formspree to take further actions based on plugins you enable. In this tutorial we are going to use the Airtable integration to store a copy of each submission directly in an Airtable Base.
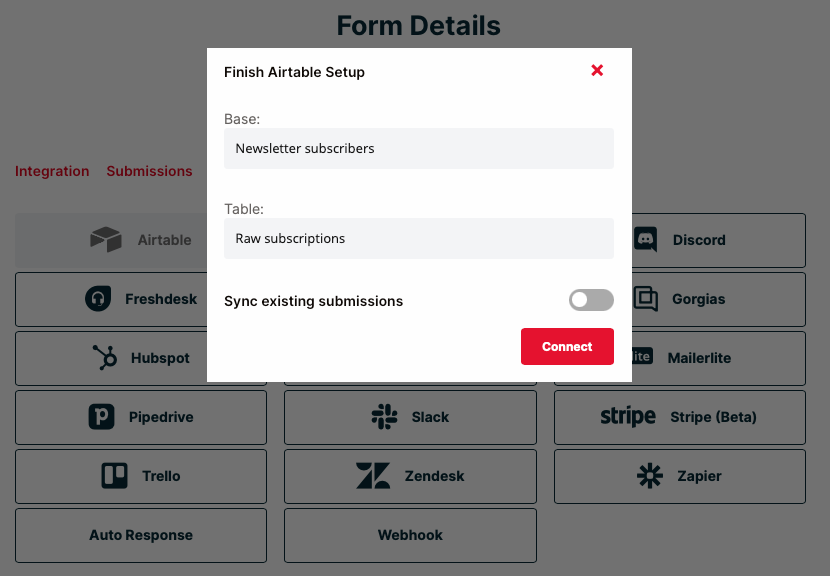
In your form settings (in Formspree), head to the Plugins menu add the Airtable integration. Grab your Airtable API key (here’s how to do that) and paste it into Formspree. Once connected Formspree will allow you select your Base and Table. We’re using a Base called “Newsletter subscribers” and a Table called “Raw subscriptions”:
Hit “Connect” and, from now on, Formspree will send every form submission to your Airtable Base.
Something important to note: Formspree will take each
input field and, based on the
HTML name value for that field, update
Airtable. In our example HTML you can see we have an input field
called email. In our Airtable table we have a column
called email as well. As a result Formspree adds
the data in the right place:
<input type="email" name="email">A few other notes on Formspree “settings” you might find useful:
- Limit submissions to your domain. 99% of the time it makes sense to limit which domain can be used to make form submissions. This helps increase the security of your form.
- (Optional) Turn off email notifications. You don’t need to keep “email notifications” turned on to send your data to Airtable. You can if you’d like, but we turned them off for our forms.
3. Send a newsletter to your subscribers with Vero Newsletters
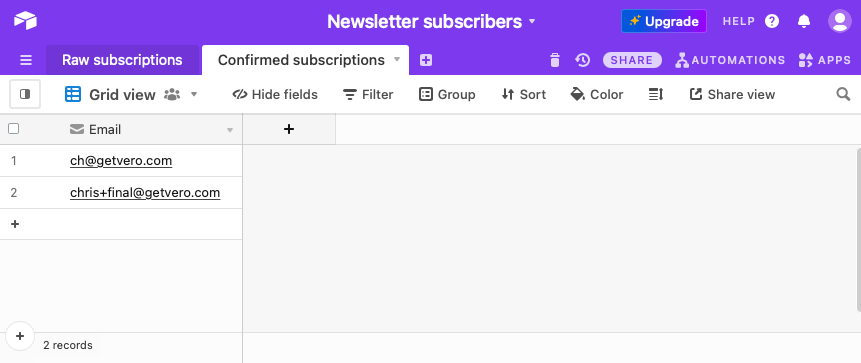
If all goes well you should now have an Airtable Base that looks a bit like this:
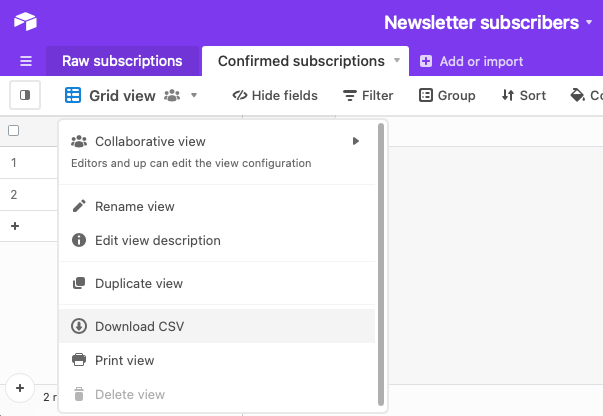
Vero Newsletters is designed to connect directly to the places that already store your customer data and load the latest copy of your audience data when you need it. We’re working on an Airtable integration (upvote it!) but, in the interim, sending a newsletter is as simple as exporting your data from Airtable via CSV:
…then creating a new Newsletter in Vero and importing it:
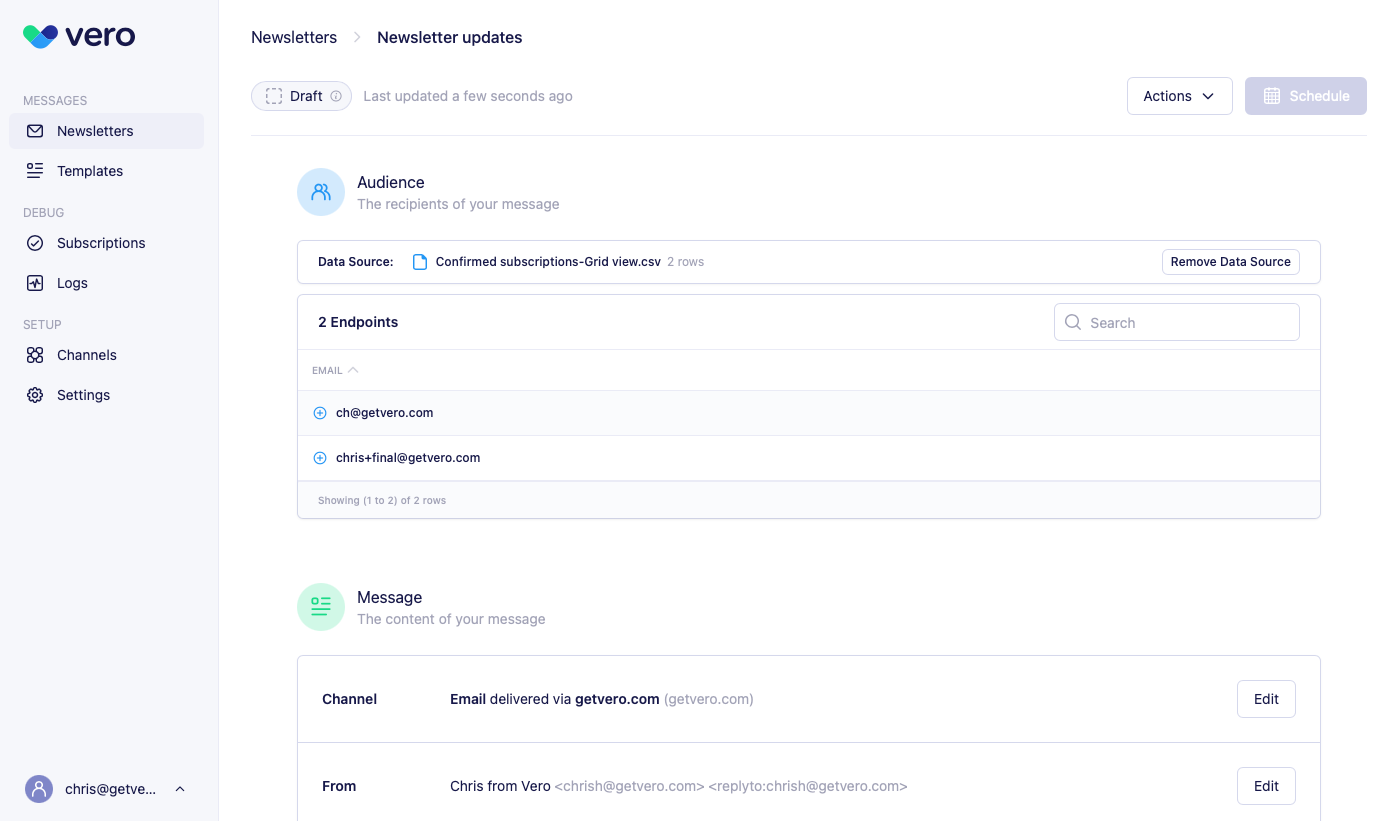
Vero Newsletters will automatically generate an unsubscribe link that you can include in your Newsletter. Vero will not store a copy of your customer data but it will store a copy of those users who unsubscribe. When you go to send your second and third newsletters Vero will automatically remove those users who have previously unsubscribed.
In this way you can think of Vero Newsletters as a giant “filter” for unsubscribes.
Conclusion
We hope this tutorial gives you some ideas on how you can build, manage and use a newsletter subscription list with Formspree, Airtable and Vero Newsletters. We’d love to see what you build and hear your feedback.
Want to send more personalized mobile and email messages to your users?
Learn moreCustomer story

How UNO uses email marketing from the data warehouse to deliver personalized mortgage broking