- All Posts
- /
- How to audit your Vero Cloud account

How to audit your Vero Cloud account
Messaging and Automation-
 Chris Hexton
-
Updated:Posted:
On this page
In this tutorial you will learn how we recommend you audit your Vero account. Clean up old data and minimize your data footprint in order to maximize your team’s efficiency and messaging ROI.
There are four steps to follow when auditing your Vero account:
- Audit your customer data.
- Audit your event data.
- Audit your email structure.
- Audit your email content.
Auditing your customer data
This step helps you minimize your data footprint in Vero.
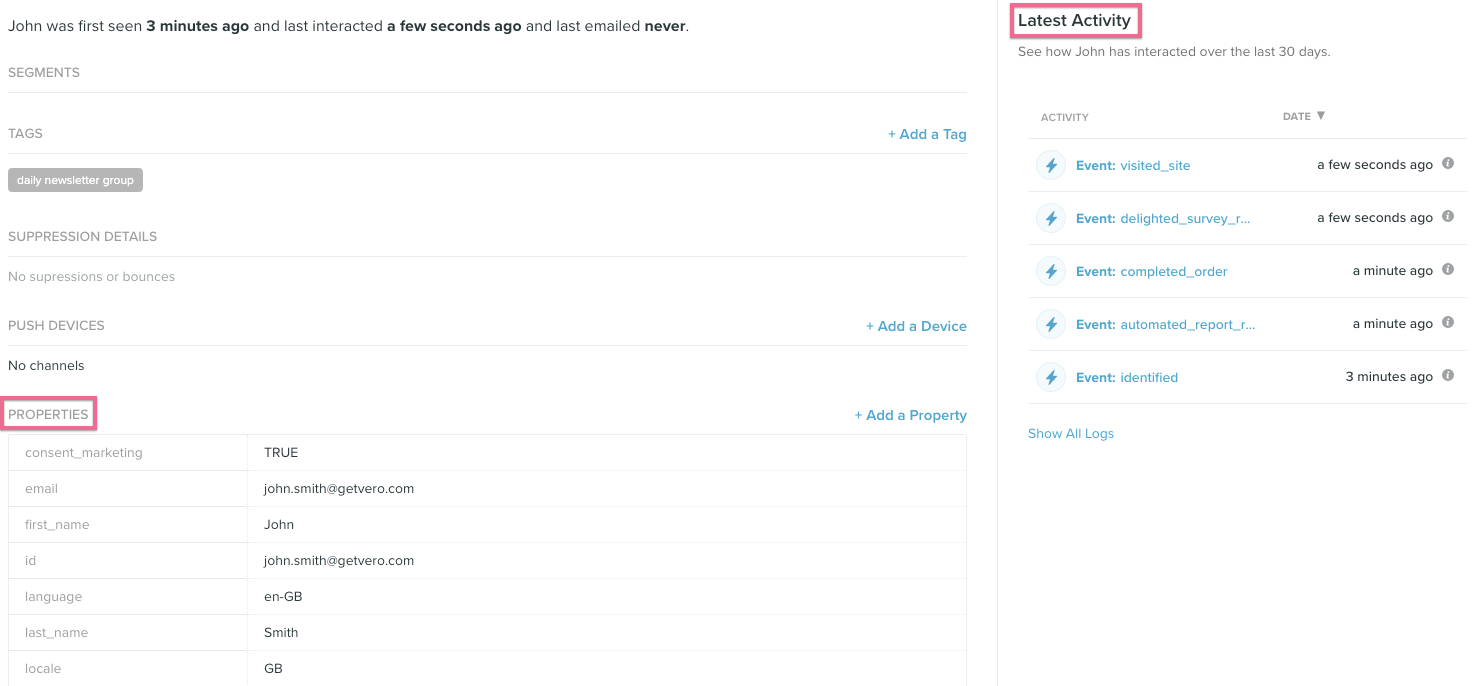
To begin, a reminder on the different types of data stored in Vero. Vero knows of two main data types: user “properties” and user “events”. User properties represent demographic and other customer data and user events represent the on-site or in-app activities the customer has taken. Here is how this data appears on a customer profile in Vero:
When auditing customer data, we recommend you find and remove customer profiles based on the following criteria:
- Customers who are not engaging with your messages.
- Customers who are inactive on your site.
- Customers whose data is unlikely to be useful for messaging in the future (you can’t get the data back).
- Customers whose data does not need to be kept for legal reasons, such as maintaining a log of subscription dates, times and reasons.
The second and/or third criteria can be skipped if you have a backup of your customer data in a warehouse or elsewhere.
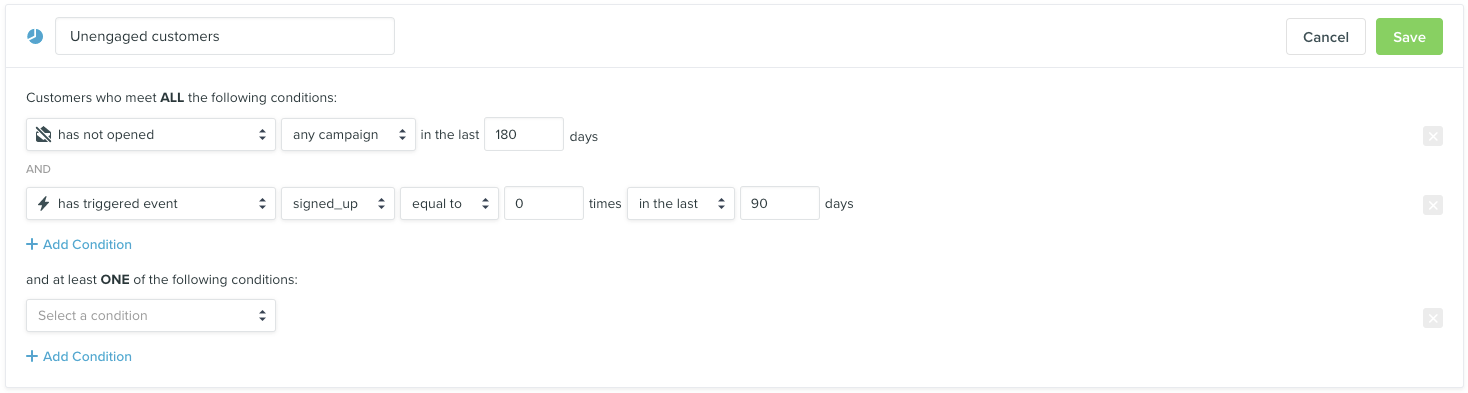
How do you find customers that have been receiving emails for some time but are not engaging with your messages? Create a segment for overall email activity and remove those who have recently signed up:
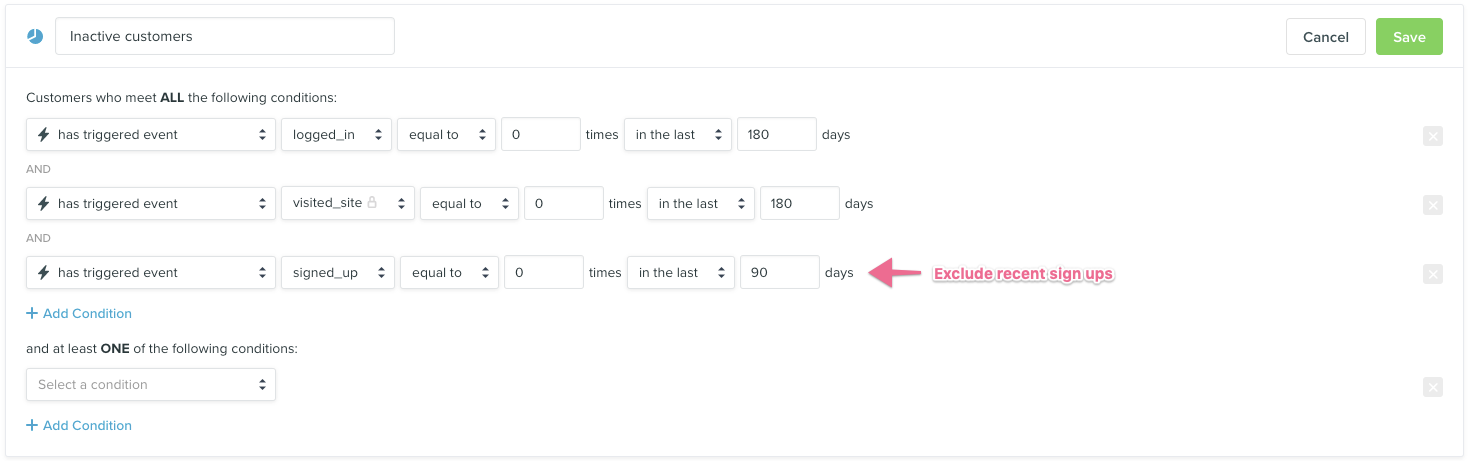
Similarly, to find customers that are inactive based on on-site
or in-app activity, we recommend using common, repeated customer
activities like visited_site,
logged_in, or viewed_page to filter
down the right group of customers. The process is similar to the
above, but using the “has triggered” event filter:
The next step is to remove these customer profiles from your Vero account! Once you have an understanding of who your active users are, have defined the relevant segments and are comfortable, please email our support team who can safely remove all of the users and their related data.
Auditing your event data
It’s easy to audit your event structure in Vero, which often gets quickly cluttered due to integrations with tools like Segment and Zapier (soon we’ll make it easy to audit your user properties faster too).
If you head to the “Events” menu in Vero, it’ll show you all the events you have tracked and when they were last “seen.” Here’s an example of two “stale” events, as they have not been seen for around a year:
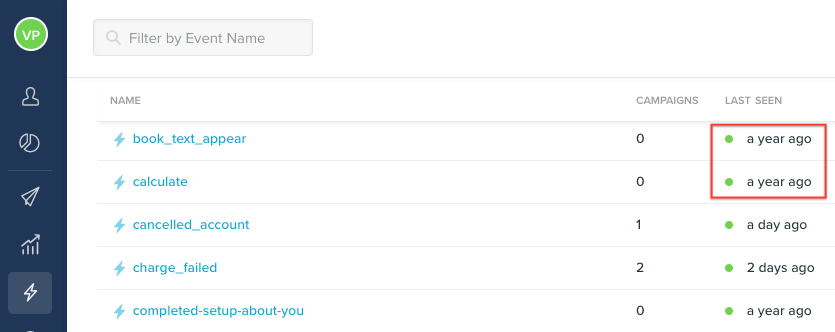
For stale events you should investigate if there are any campaigns that still rely on the event. If there are, review and archive them so that the event can safely be deleted.
Once you’ve identified stale or outdated events and cleaned up the reliant campaigns, email our support team with a list of your stale events (or a cut off for when you deem an event to be stale) and we will remove them from your account safely.
Audit your email structure
Vero supports two main use cases:
- Announcement and marketing campaign-driven messaging via our “Newsletters.”
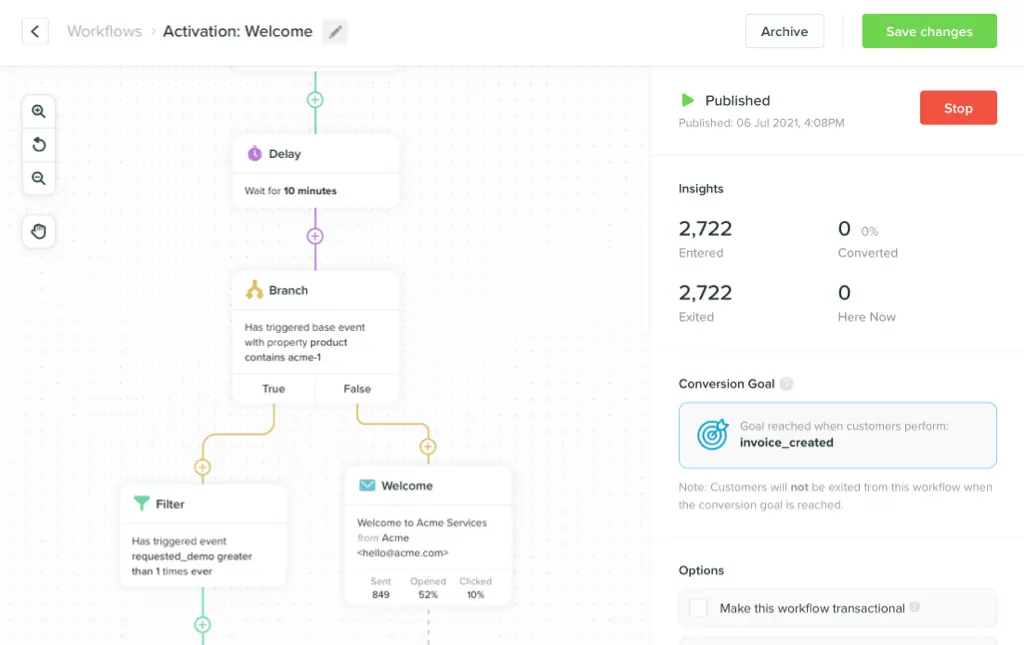
- Product engagement emails automated via our “Workflows” (and historically “Behavioural” and “Transactional” campaigns).
Cleaning up “Newsletter” campaigns is typically a matter of archiving old messages so they do not appear in the primary search and filter view on the campaign’s page.
This is a relatively easy process, and some of our customers tend to archive campaigns on a rolling weekly or monthly basis.
When auditing “Workflows” (formerly “Behavioural” and “Transactional” campaigns), we recommend first reviewing the campaigns that you have in Vero and understanding their general flow.
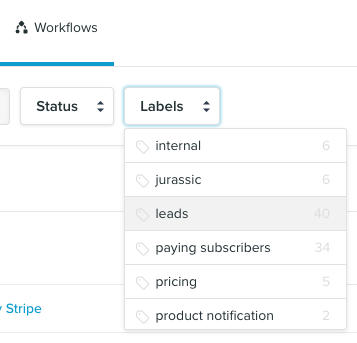
As you review, you should add or update your label structure to create a coherent system. A great labeling system goes a long way as it lets you readily come back and review groups of emails. The labeling system that we use here at Vero is very much built around:
- “Internal” messages (messages triggered internally to our team)
- “Trials” targeting users trialing Vero
- “Customers” targeting paying customers
We use labels that represent the stage of the customers lifecycle, which makes it easy for us to see and filter “Workflows” related to customer lifecycle events:
Once you have an understanding of what you’re sending, you should update or create a mind map of the messaging structure that you’d like to have. We currently like using Miro to do this, here’s an example of a mind map of our own:
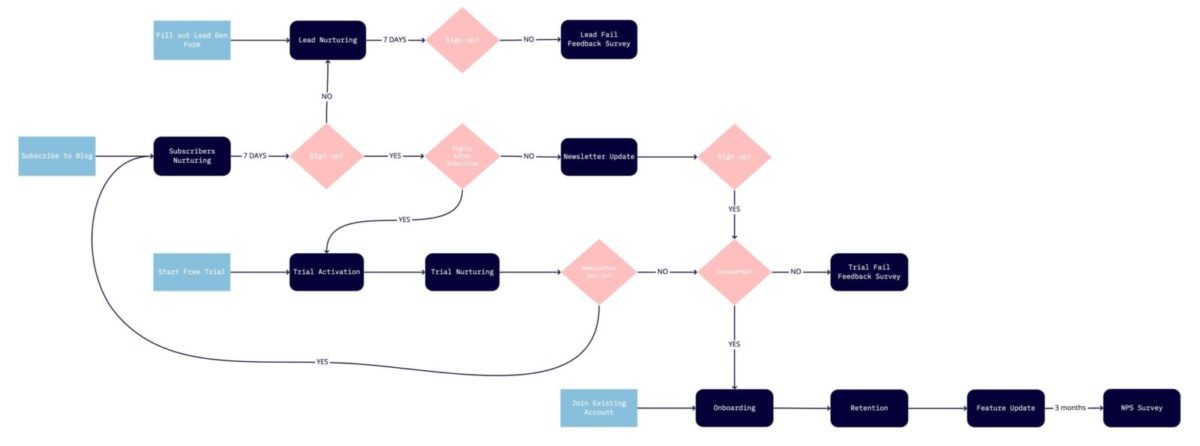
Then, map the campaigns that you’re currently running against the new structure to find gaps and areas where current workflows must be changed. The goal is to define workflows against your customer lifecycle events, driving customers toward the “next ideal action.”
Another handy tip is to review campaigns that have not been sent recently. You can do this using our bulk export for all campaigns over the last 30 days to find unsent campaigns.
 Campaigns that have not sent any messages for 30 days will show
up with
Campaigns that have not sent any messages for 30 days will show
up with sends as 0 in the CSV:

This can be useful to find and remove unnecessary campaigns.
Auditing message content
This can be a large task and the approach depends on how you have set up your templates.
Auditing all campaign content
When using any of Vero’s other campaign editing methods, reviewing content is completed on a campaign-by-campaign basis.
The best way to review content is to preview each of your messages in turn.
We recommend checking for both dynamic content issues (checking your Liquid) and, for email messages, rendering issues (ensuring the email looks good everywhere).
There is no shortcut for this process, and we recommend previewing messages both in browser and via your inbox and devices.
For emails, testing in conjunction with a service like Litmus or Email On Acid in order to ensure everything is working as expected makes life a lot easier.
Some tips on things to look out for when reviewing campaign content:
- Ensure you have “fallbacks” in place when using Liquid in your messages so that customers without personalized content won’t see weird “blanks” in their messages.
- Pay particular attention to images and links when using Litmus to ensure these render correctly. Litmus will automatically validate that links are correct.
- Adding some “test profiles” to your account can make it faster and easier to preview messages “as a user.” This is where you can view a variation of content based on users who do or do not have user properties, and what is contained in those properties.
- This is useful when testing push messages, as you can add test users to your account with varying push tokens across test devices (this is done as part of setup in any event).
- Using the “Test” trigger available on the “Events Manager” makes it easier to trigger events with dummy data, record events, or trigger messages directly to yourself.
-
When previewing messages in Workflows that use
{{event.___}}variables in Liquid, Vero will automatically use the user who last triggered the trigger event for the preview. Selecting your own user will override this. - You can set up multiple “Projects” in Vero and put a project into “Test Mode” so that all emails triggered to any customer are sent to one, central email address, making it safe to trigger emails in a “live” fashion and test content.
- You can clone campaigns and workflows between projects too!
Auditing ‘vero-editable’ email templates
Historically, Vero’s templates have supported an “inheritance” model, where a template has multiple “editable” regions.
These are created by appending the CSS class “Vero-editable” to a HTML element, and these regions are editable on a template-by-template basis, with the remainder of the email content being inherited from the template itself.
Under this model, changes made to any base templates are automatically inherited by campaigns that use that template.
This works perfectly, unless you edit the layout of the template itself.
For example, if you add “editable” regions or change the HTML elements that “editable” regions are attached to.
In this scenario, Vero will highlight that the updated template was not able to be inherited by the campaigns using it.
Rather than attempt to merge the contents and break your campaigns, we leave the current version of the campaign running and, instead, tell you how many campaigns are affected.
You can view the affected campaigns by selecting “View related campaigns” from the “Templates” menu:

To resolve conflicts, click on each affected campaign in turn. Vero will take you to the affected campaign.
After you review the contents and adjust the campaign, hit “save” to save the updated copy and put this new version live.
Get cleaning!
We hope this tutorial gives you a framework for tidying up your Vero account.
If you have questions or want assistance on any of the above, please email us at support@getvero.com.